Friday, August 9, 2013
Altered Art Trinket Box Youtube Video
Hello everybody, I just wanted to post a short video on my "mostly" finished trinket box that I had done the tutorial on a few posts back. Let me know how you all like it. Its my first one showing any of my art so hopefully its not to cheesy lol
Sunday, June 30, 2013
Petaluma Antiques Fair 2013
Petaluma Antique Fair April 2013
Hey bloggers, I wanted to share with you some pics I took at the antique fair in downtown Petaluma. I took these pictures using my cell phone which was set on close up so they don't look all that hot enlarged. Lesson learned, next time bring the "real camera"
Anywho, I went to the fair with my best friend Colette and both my daughters and granddaughter. It was going to be hot that day so we set out early, lucky for me my kids are early risers just like there mommy!. The booths were overflowing with items this year. I took many more pics but only posted a few. Hope you like them.
Pretty little tea cups looking so dainty!
My granddaughter haming it up for grandma!
This was so cool, A vintage dress form from early 1900s I absolutely wanted to take this home with me. I love the design and vintage colors, I have never seen one like it.
Pretty Butterfly
Here is a view of the "Petauma River" seems a little low to me....
This used to be a dance club we used to hang out in back in the 80's. Looks a wee bit different now a days
Here is a pic of me and my granddaughter, for some reason she had a thing about sticking her tongue out that day lol, kids. BTW I got that hat for 5 bucks at the fair and yes my eyes are closed can never seem to take a decent pic with them open.
Hey bloggers, I wanted to share with you some pics I took at the antique fair in downtown Petaluma. I took these pictures using my cell phone which was set on close up so they don't look all that hot enlarged. Lesson learned, next time bring the "real camera"
Anywho, I went to the fair with my best friend Colette and both my daughters and granddaughter. It was going to be hot that day so we set out early, lucky for me my kids are early risers just like there mommy!. The booths were overflowing with items this year. I took many more pics but only posted a few. Hope you like them.
Pretty little tea cups looking so dainty!
My granddaughter haming it up for grandma!
This was so cool, A vintage dress form from early 1900s I absolutely wanted to take this home with me. I love the design and vintage colors, I have never seen one like it.
Here is a view of the "Petauma River" seems a little low to me....
This used to be a dance club we used to hang out in back in the 80's. Looks a wee bit different now a days
Here is a pic of me and my granddaughter, for some reason she had a thing about sticking her tongue out that day lol, kids. BTW I got that hat for 5 bucks at the fair and yes my eyes are closed can never seem to take a decent pic with them open.
Tuesday, May 14, 2013
My New Line of Rubber Stamps are Here
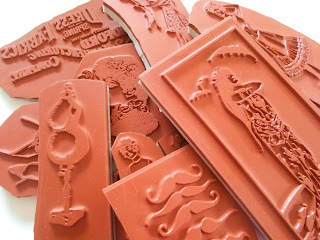
I have so many wonderful vintage images that I have long thought would make great stamps, so I finally got up enough courage to have some made. There are sixteen images manufactured on one 8 1/2 by 11 sheet. I have trimmed them as close to the image I can so it will make a good impression when stamped. They have cling foam already added so they are ready to use as soon as you get them in the mail. How do you all like them? If you would like to see them close up or make a purchase visit my etsy shop here at Laughngypsy.
All my stamp designs before manufacturing
First Cut of Rubber Stamp Sheet
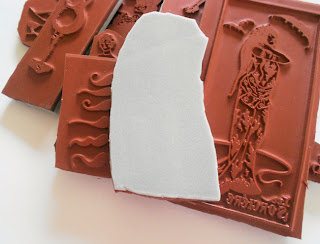
Cling foam on back of stamp so there ready to use!
I am so excited to bring new Red Rubber Stamps to the scrapbook and paper crafting industry!
All my stamp designs before manufacturing
Cling foam on back of stamp so there ready to use!
I am so excited to bring new Red Rubber Stamps to the scrapbook and paper crafting industry!
Sunday, April 14, 2013
Easy Background Tutorial for Altered Art or Mixed Media
Easy Background Tutorial
I thought I would share a technique with you that I did on a box I got from the Goodwill. The box reminded me of a box my mother might have had when she was younger, it just looked vintage to me so I picked it up for $1.99.The first thing I did besides pat myself on the back for a bargain buy was to Gesso the box. I have to say that there are different kinds of Gesso and I recommend the Bob Ross Gesso, it seems to adhere better than the cheap ones and has better "tooth" that which hold the paint on the surface of your project.
Box before Gesso
Box after Gesso, notice its all white and you can still see part of the box pattern? Thats ok because we want a little extra pattern.
This is the inside of the box, I don't know what I am going to do inside but I thought it would make a good trinket box for all the little goodies I pick up.
Next take some regular white tissue paper and rubber stamp all over it with your favorite stamps. I used a mix of different French stamps on mine. I also used stazon jet black ink.
I love the way the stamping came out on the tissue paper. After it dried I then crinkled the tissue paper up some, not to much but enough to give you some good texture on you adhere it.
I tried a new product on this box its Collage Decoupage by Alieens. Just use a little bit so as not to tear the tissue paper and adhere the paper to the box, make sure you get the lip part of the box.
Once it dried (I hate waiting for it to dry, no patience I guess lol) I then took some dabs of Gesso and blotted it on the cover to give it some tooth because some paints and watercolors won't stick to Decoupage.
Now Its time to use one of my favorite tools, water color crayons. These are so fun to play with and mix colors with.Today I am going to use Ocher and Brown. The great thing about water color is you can dilute it to be very transparent or use full strength and have more opaque color.
Just like grade school, scribble over the top cover with the crayons or just paint wherever and how much you like for your project.
Now paint with some water and voila instant color! Awesome, right?
see how intense this color is? Not to worry, I will tone it down later.
Blot off excess water and color and then let dry
this is what it looked like when dry
It was to yellow for me and I also wanted more texture so I lightly painted with picket fence, just enough so when it dried I could add in some distress ink into the cracks for dimension
I chose worn lipstick, just a very light coating. I added more paint and ink here and there until I liked the outcome.
Now I want one of the top and bottom corners to be more white than pink so I added a little distress stain picket fence, it tones down the paint and ink but adds no texture. this i dried with my heat gun.
I didn't add to much and it dries very light even though it looks like I covered it up
This is one of my favorite things to do to my projects. it adds texture and color. you take some versamark watermark ink and just rub here and there on your work. if you get a spot you don't like rub it off with your fingers or a paper towel before you add the embossing powder and heat set. When you have your ink where you want it add the embossing powder, you can add or remove whatever you don't like, just be sure to do it before you heat set it.
This is what mine looked like. I see its kind of square shaped but thats okay I am going to fill up the corners and the middle to tone down some of the gold and make it look more shabby chic I used my snow cap paint dabber, just dabbing here and there until I liked the way it looked.
I also used my favorite tool, my fingers lol to rub in the dabber paint. Now you can use whatever colors you want on your project. I was going for shabby chic with white and pink for my piece.
This is the final result. I like it, now on to the decorating of the box. That will be my next tutorial Part 2
Part 2 is here
Thursday, March 14, 2013
New Graphic 45 Project
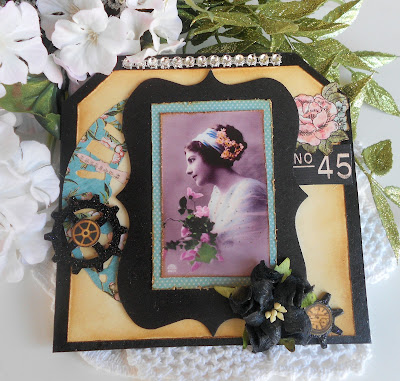
I love this vintage image of the woman holding the bouquet of flower so much so I had to do a small card with her as the main focal point. I used Graphic 45 papers for the clock and pink 2d flower. The black flower was an iamroses gardenia that I had painted black. The gears are Tim Holtz tiny gears and the silver trim I got at clearance at my local craft store.
Nothing big this week as I am working on my Spice Rack. I found an old spice rack at the goodwill and am redoing it with Graphic 45 Birdsong. I Can't wait to finish it and post pics here.
Hope everyone has a great crafty week!
Thursday, March 7, 2013
Graphic 45 Altered Box
Altered Box
With Graphic 45 Curtain Call
This is my first Altered Box. I had to use the few sheets of Graphic 45 Curtain Call sheets I had picked up at clearance at my local craft store ( I missed the paper pack) I had gotten a small round paper mache box at the craft store and painted it with black acrylic paint. When that dried I painted it with Black Stiletto Glimmer Glam, now I don't know how many of you used glimmer glam from Tattered Angels before but I love that stuff, it adds a real black color but with tiny specks of glitter and a great shine its one of my must have products..
After the paint dried I cutout the lovely woman's face using the Spellbinders Scalloped Circles Die and one larger circle for the background of the woman. I also used the Peacock paper for the final bottom piece that circled the entire top lid.
Next I made my own embellishment using a handmade paper flower and some tulle, I also used a handmade stick pin which are fun to make using corsage pins!. I cut out some of the postage sized images and glued them on the sides of the box. I added Flim Strip by Tim Holtz and a metal key from K & Company to finish it off.
I really enjoyed doing this box and have since bought a few more boxed to decorate so stay tuned for more Altered boxes coming soon lol.
Products used in this box are
Paper Mache Box
Thursday, February 21, 2013
Digital Collage Sheets Available
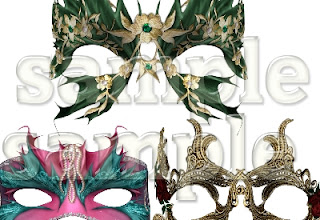
Did you know I also sell Digital Collage Sheets? Well here is a sample of some of the wonderful Collage Sheets I have in my other shop, Wotdoin at Etsy, I also have digital vintage postcards as well. Take a peek...

Here is a favorite! Digital Collage Sheet Wings.

Another popular sheet is my Digital Collage Sheet Mask and Wings!
Stop by and say hello and see all the great items available for your craft needs!
Subscribe to:
Posts (Atom)


